Docs
Overview
Getting Started
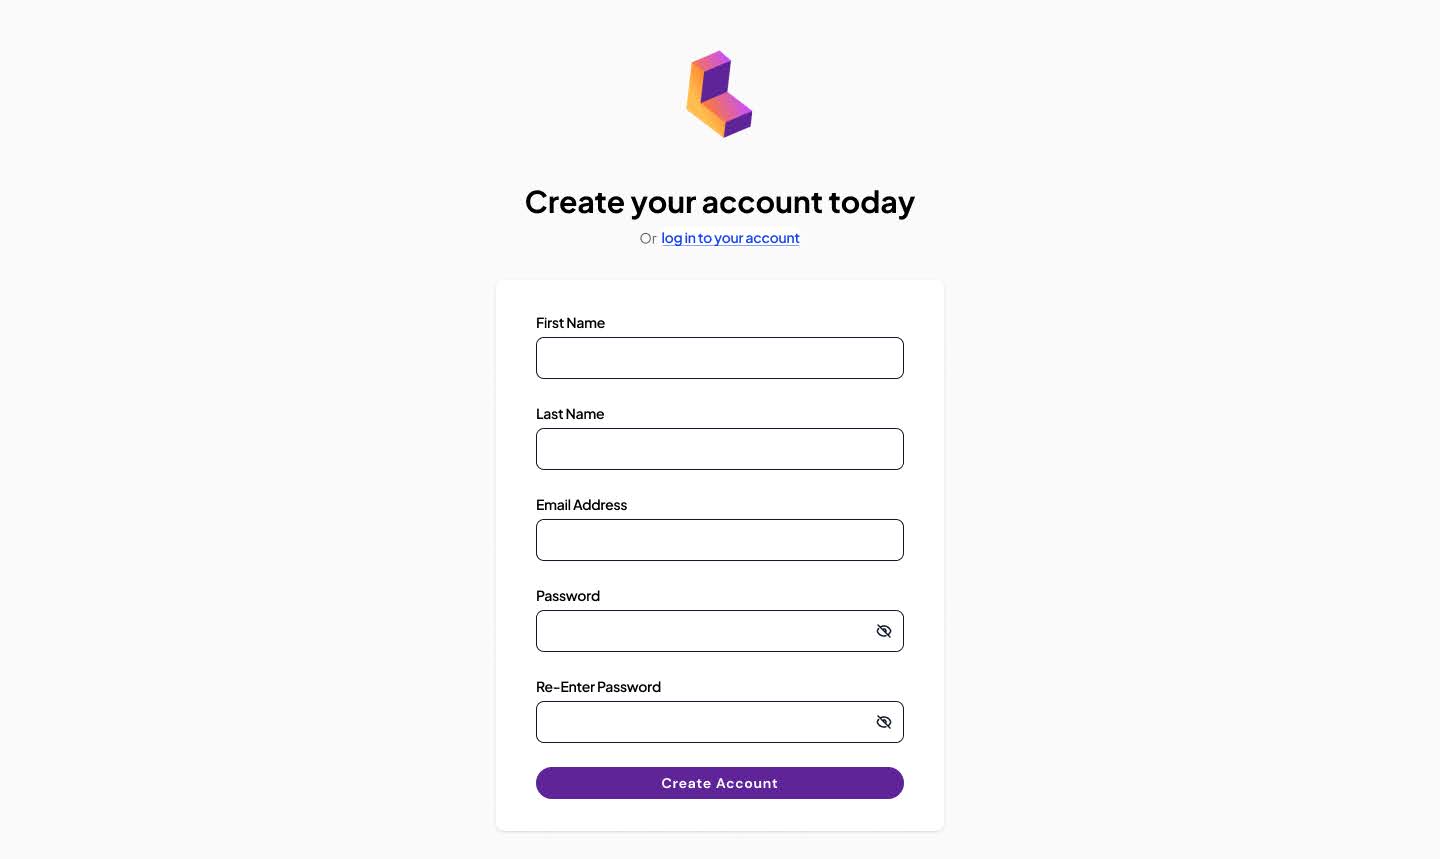
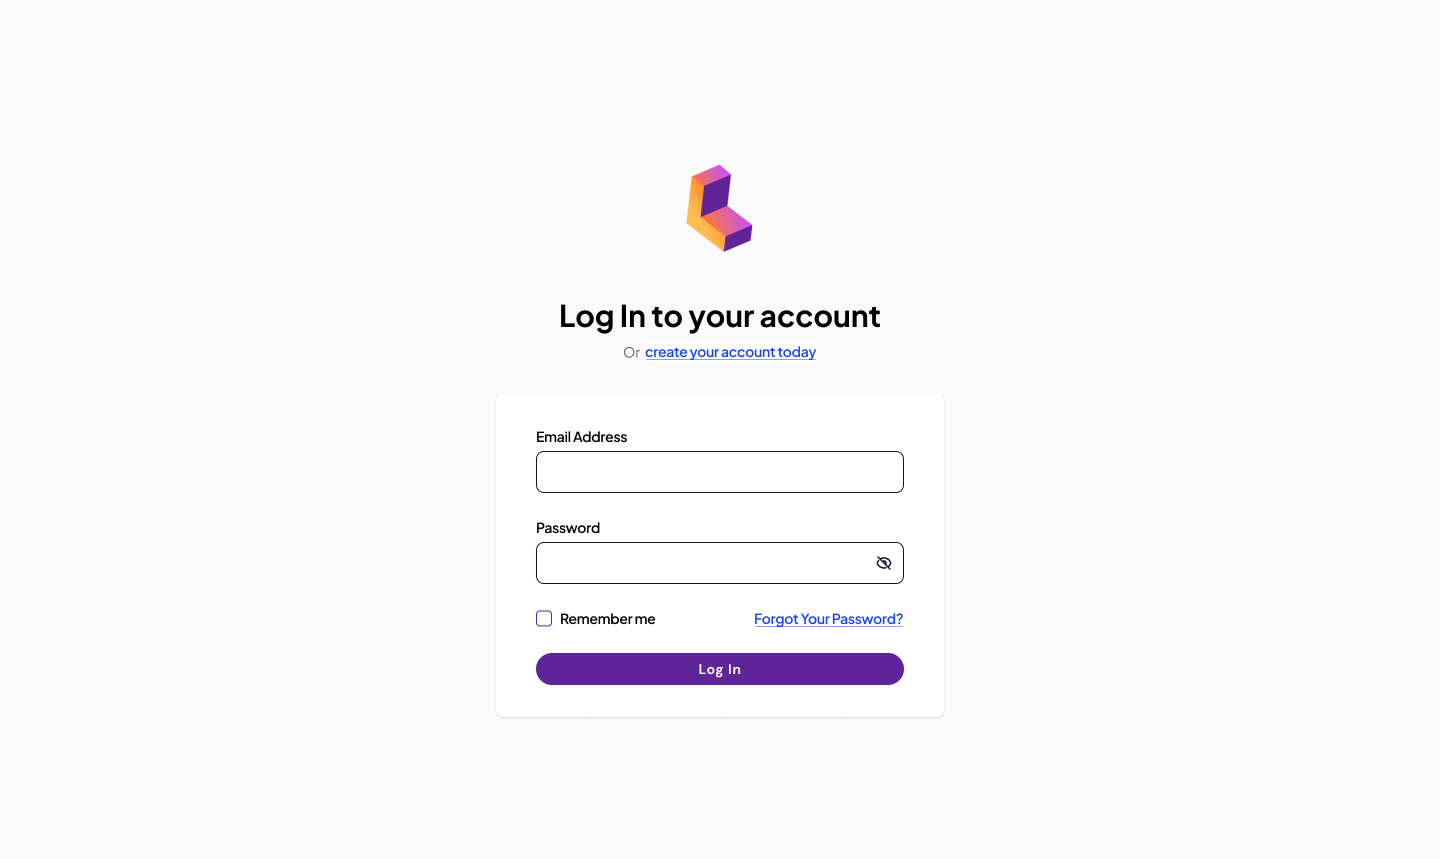
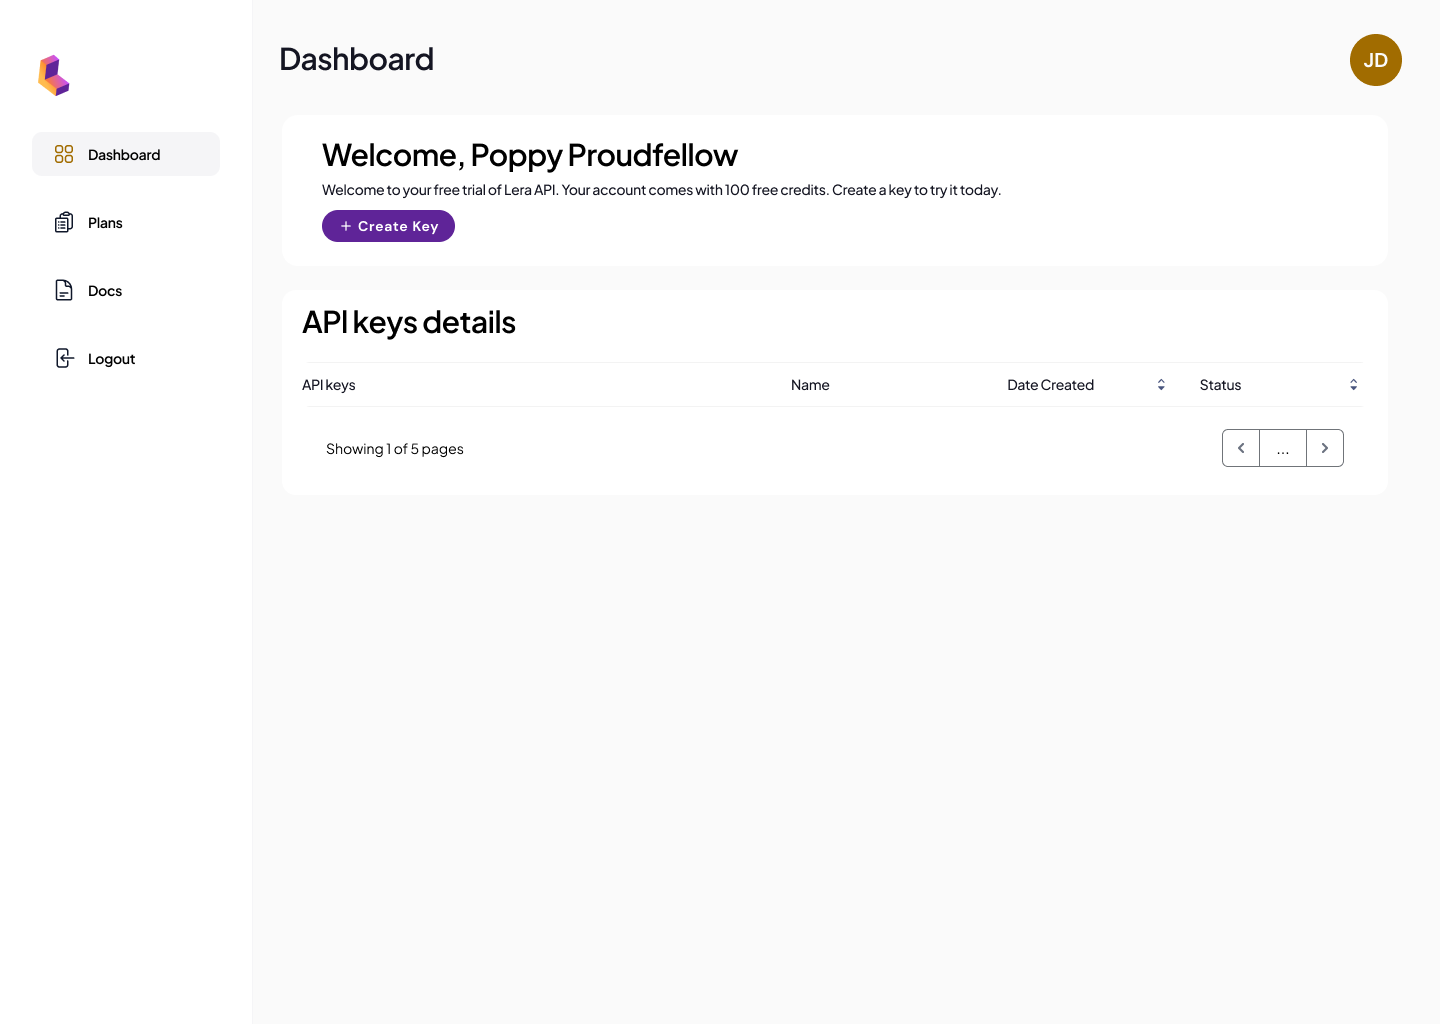
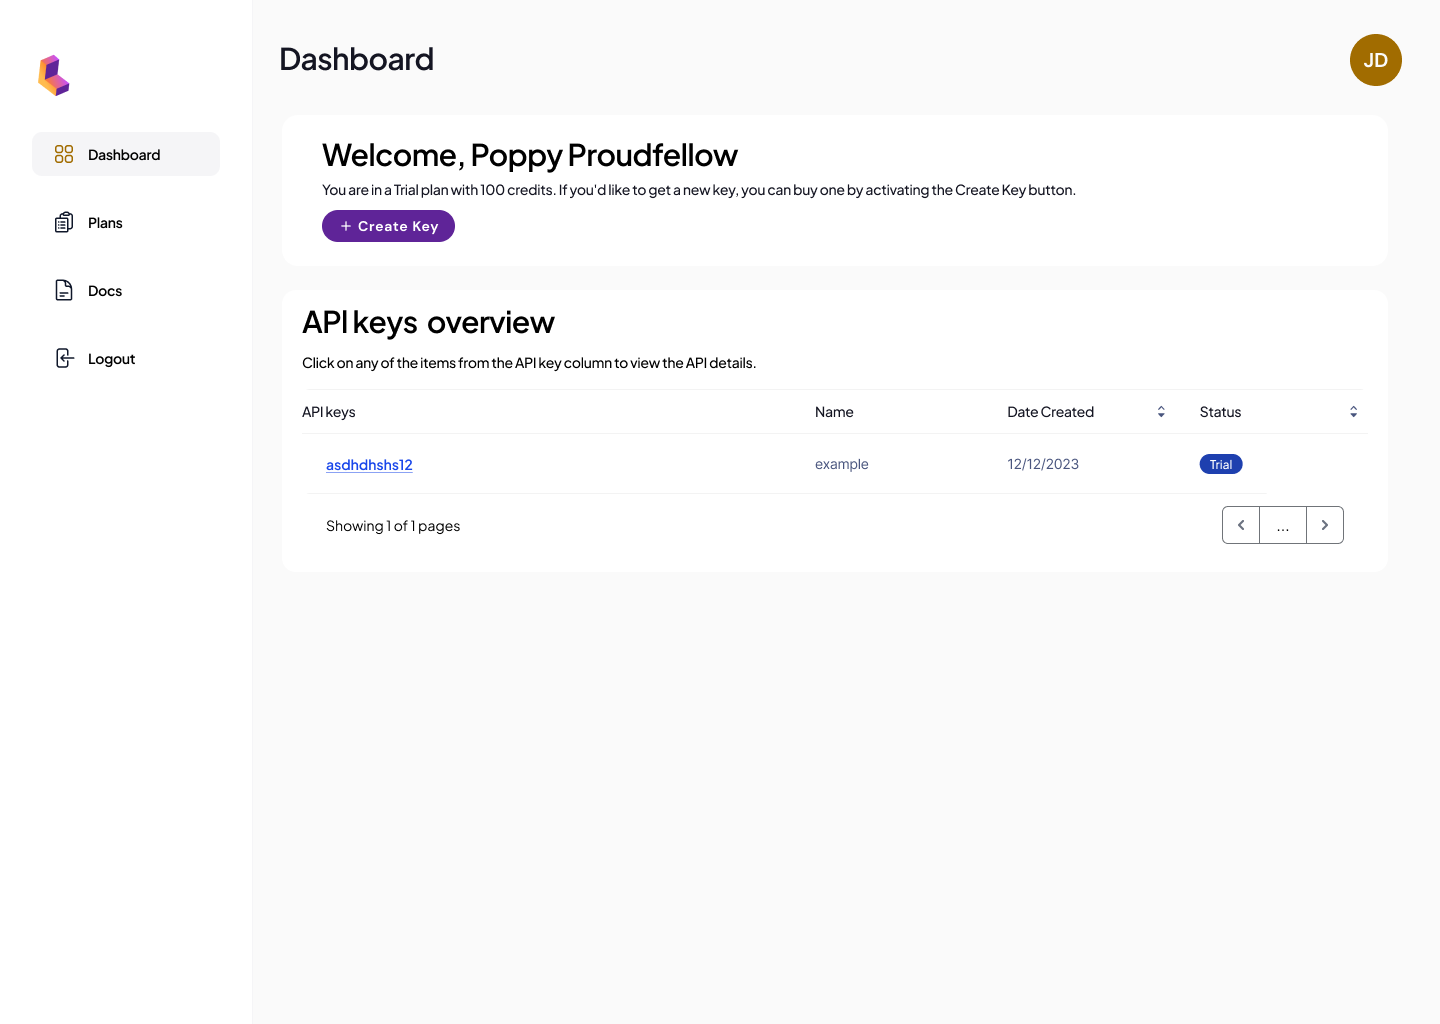
Creating an API Key
Key Management
API Key
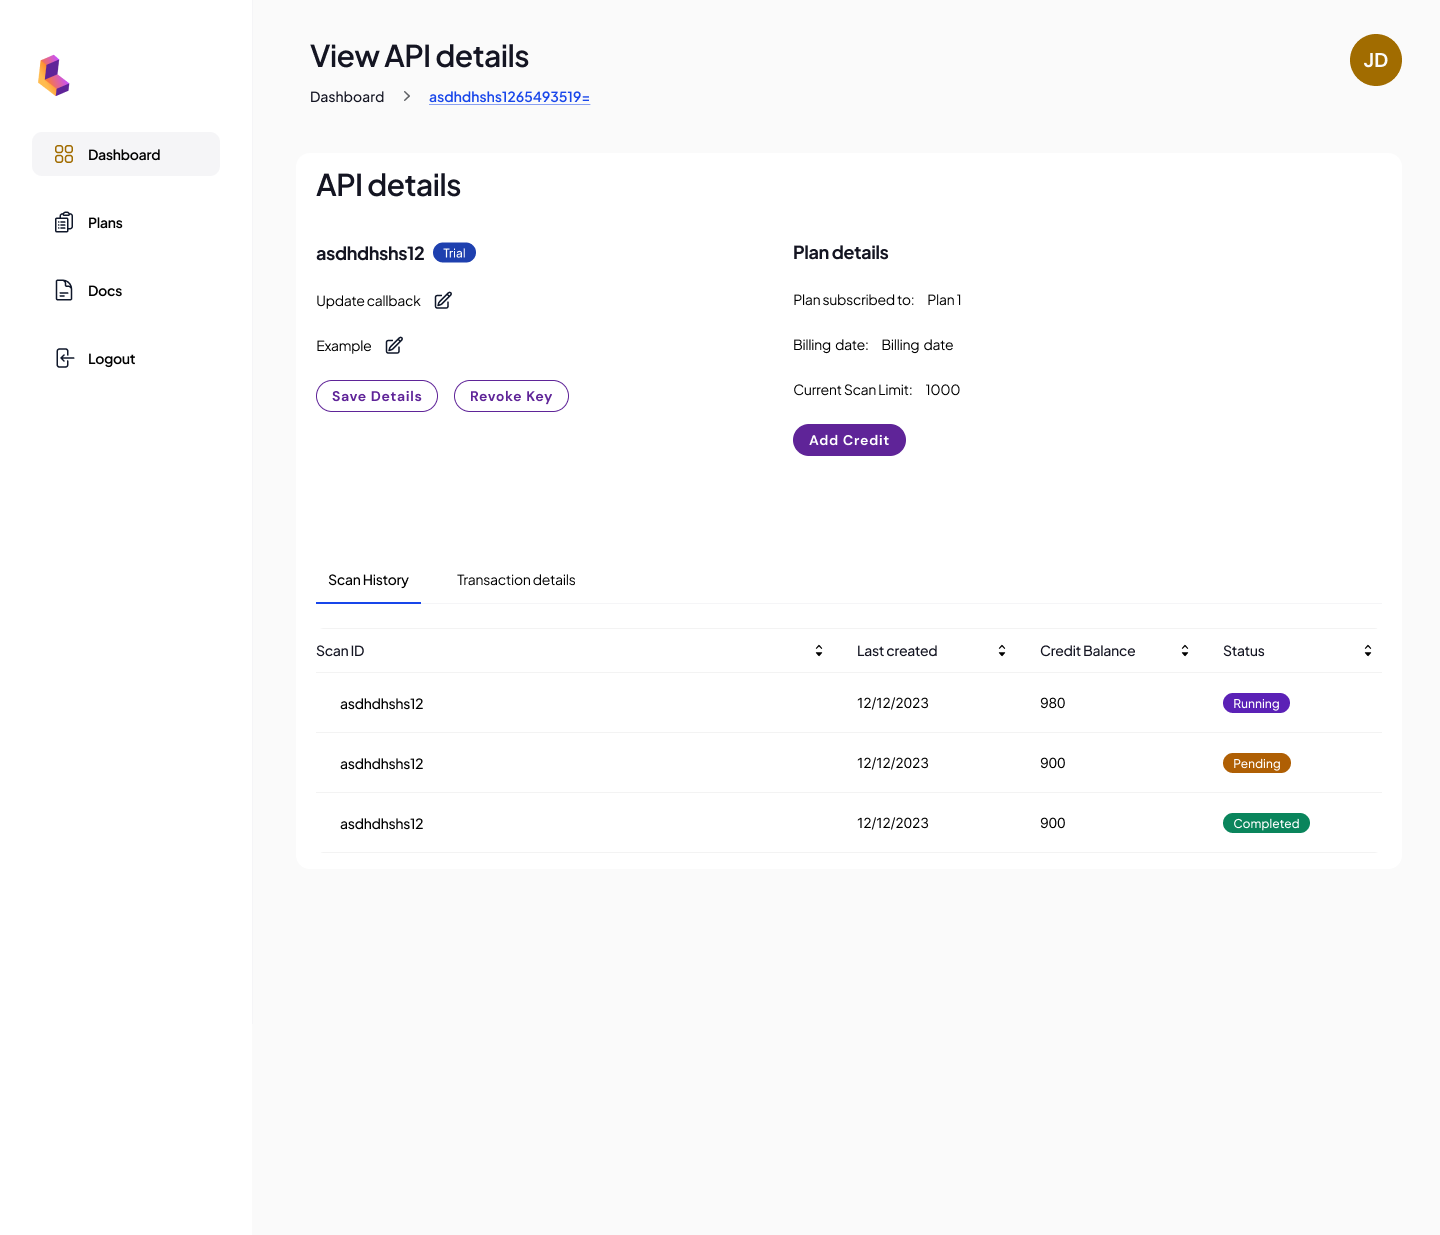
From the API key details page, you will find the following information:
- Callback URL: Optional, used for scan data delivery.
- Key Name: Helps you organize and find your API keys later.
- Trial Status Badge: Shows the status of your current plan.
- Plan Name: The name of your current subscription.
- Billing Date: Displays your next billing date.
- Scan Limit: Updates dynamically as you run scans.
You can also view your scan history and transaction details (note that a trial key will not show any transactions since it’s free).
Revoking an API Key
Securing your key
Below are best practices for securing your API key:
1. Use Postman Desktop Client Instead of the Web Version
When testing API requests, avoid using the Postman web client, as it may store sensitive data like your API key in the cloud. Instead, use the Postman desktop client, which keeps data stored locally on your device, reducing the risk of key exposure.
2. Encrypt Your API Key in Client-Side Code
When embedding your API key in client-side applications (e.g., JavaScript), ensure that it’s encrypted before being used in API calls. This prevents exposure in the browser's developer tools or network logs. Use libraries such as crypto-js for encryption and axios for making HTTP requests securely.
This ensures that your API key is not exposed in plain text in the network request.
3. Store API Keys in Secure Password Vaults
Rather than hard-coding API keys in your source code or storing them in project configuration files, use a secure password vault or secret management service to store and retrieve them. Some trusted vaults include:
- 1Password or LastPass for securely storing credentials.
- AWS Secrets Manager or Azure Key Vault for managing secrets in cloud environments.
- Environment variables (with strong access control on the system) for runtime key management.
4. Use Environment Variables for Configuration
In server-side code, never hard-code API keys directly in the source. Instead, store them in environment variables or secrets-config files and reference them in your application.
Example in Node.js:
js

const apiKey = process.env.LERA_API_KEY;
axios.post(`https://api.lera.cloud/api/start_audit/${apiKey}`, {
    url: 'https://example.com/',
    callback_url: 'https://example.com/callback'
});
Ensure your .env and secrets-config files are never included in version control by adding it to .gitignore.
5. Restrict API Key Usage
Where possible, limit the permissions and usage of your API key. For example:
- Apply IP whitelisting to restrict which servers or devices can use the key.
- Use rate limiting on your client-facing applications to prevent abuse by limiting the number of API requests made with a key.
- Generate specific keys for different services or environments (development, production) and enforce appropriate access controls.
6. Monitor API Key Usage
Enable logging and monitoring to track the usage of your API keys. This helps detect any abnormal or unauthorized behavior quickly. Review logs regularly to ensure that your API keys are not being misused.
7. Keep Your Code Private
If you're using version control services like GitHub, ensure your code repositories are private, especially when working on applications that utilize API keys. Additionally, double-check that your API keys are not accidentally pushed into public repositories.
8. Replacing Your Key
If you suspect your key has been compromised, change your password immediately and contact support to regenerate a new API
Using the API
Setting Up a Listener Endpoint for Receiving Callback Data
1. Create the Listener Endpoint
The listener endpoint must be able to accept POST requests and handle incoming JSON data from the Lera API. Here’s an example of how you can set up a basic listener using different server-side languages.
Node.js (Express) Example:
javascript

const express = require('express');
const app = express();
app.use(express.json());

app.post('/callback', (req, res) => {
    // Extract data from the callback request
    const results = req.body;
	. . . . .

    });

// Start the server on a specific port
const PORT = process.env.PORT || 3000;
app.listen(PORT, () => {
    console.log(`Callback listener running on port ${PORT}`);
});
Python (Flask) Example:
python

from flask import Flask, request, jsonify

app = Flask(__name__)

@app.route('/callback', methods=['POST'])
def callback():
    # Extract data from the callback request
    results = request.get_json()

    # User application logic should go here
    # For example: process or save the results

    # Respond with a success status
    return jsonify({'message': 'Callback received successfully'}), 200

if __name__ == '__main__':
    # Start the server on a specific port
    PORT = int(os.environ.get("PORT", 3000))
    app.run(host='0.0.0.0', port=PORT)
Make sure your endpoint is set to listen on a publicly accessible port (e.g., https://yourdomain.com/callback).
2. Ensure HTTPS
Since the callback_url requires HTTPS, your listener must use a valid SSL/TLS certificate. You can set this up by using services like Let's Encrypt or Certbot or by hosting your endpoint with a platform that provides SSL, such as AWS, Heroku, or Vercel.
If you’re testing locally, tools like ngrok can expose your local server to the internet and provide a temporary HTTPS URL.
3. Set Cross-Origin Resource Sharing (CORS) Policies
If the Lera API and your callback endpoint are hosted on different domains, ensure that appropriate CORS policies are set up to allow cross-origin requests.
For Node.js (Express), you can use the cors package:
javascript

const cors = require('cors');
app.use(cors({
    origin: 'https://api.lera.cloud',  // Allow requests from the Lera API domain
    methods: 'POST',
    credentials: true
}));
For Flask (Python), you can use the flask-cors library:
python

from flask_cors import CORS

app = Flask(__name__)
CORS(app, resources={r"/callback": {"origins": "https://api.lera.cloud"}})
By setting CORS headers, your server will accept cross-origin requests from the Lera API.
4. Validate Incoming Requests
Ensure that the callback data is coming from a trusted source, like the Lera API. You can implement additional security measures such as:
- Whitelisting IP Addresses: Restrict the IP addresses that can send data to your listener endpoint.
- Signature Validation: Include a signature or token in the callback request that can be validated against the Lera API to ensure authenticity.
Example of checking the request IP:
javascript

const trustedIps = ['LERA_API_IP_1', 'LERA_API_IP_2'];

app.post('/callback', (req, res) => {
    const clientIp = req.connection.remoteAddress;

    if (!trustedIps.includes(clientIp)) {
        return res.status(403).send('Forbidden');
    }

    // Process the valid request
});
5. Handle the Response
Once your listener receives the data from the Lera API, ensure it responds with an HTTP 200 OK status to confirm successful receipt. If the API doesn’t receive a 200 response, it may retry the callback multiple times.
If there are errors during processing, ensure your server logs these errors for debugging.
6. Set Up Logging and Monitoring
Monitor your listener endpoint to ensure it's functioning correctly and logging any incoming callback data for further analysis. This will help you debug any issues related to receiving and processing callback requests.
7. Test the Endpoint
Before going live, test your listener endpoint using tools like Postman or curl to simulate a callback request and verify that the data is correctly received and processed.
Example callback test with curl:
bash

curl -X POST https://yourdomain.com/callback \
-H "Content-Type: application/json" \
-d '{
    "audit_id": "65c6348d4a0c48a34d996590",
    "num_links": 1,
    "scan_limit": 624
}'
Running Without Callback URL
If you don’t provide a callback URL, only the scan summary will appear directly in the response, but the actual data won’t be delivered elsewhere.
Authentication
1. Login Endpoint: The authentication process starts with sending a POST request to the login endpoint using the base URL provided.
https://dev.api.lera.cloud/api/login
2. Request Body: The body must contain the email and password used when signing up for a new account.
Example Request Body:
json
{
  "email": "your-email@example.com",
  "password": "your-password"
}
3. Response: If successful, you will receive a response that includes several fields, including is_verified: true. This confirms that the email has been successfully validated during the sign up process.
4. Session Duration: The session is valid for 24 hours, during which you can run scans without needing to re-authenticate. After 24 hours, you will need to run the authentication step again.
Running a Scan
https://api.lera.cloud/api/start_audit/API_KEY
Note: Replace “API_KEY” with your unique API key.
Steps to Run a Scan:
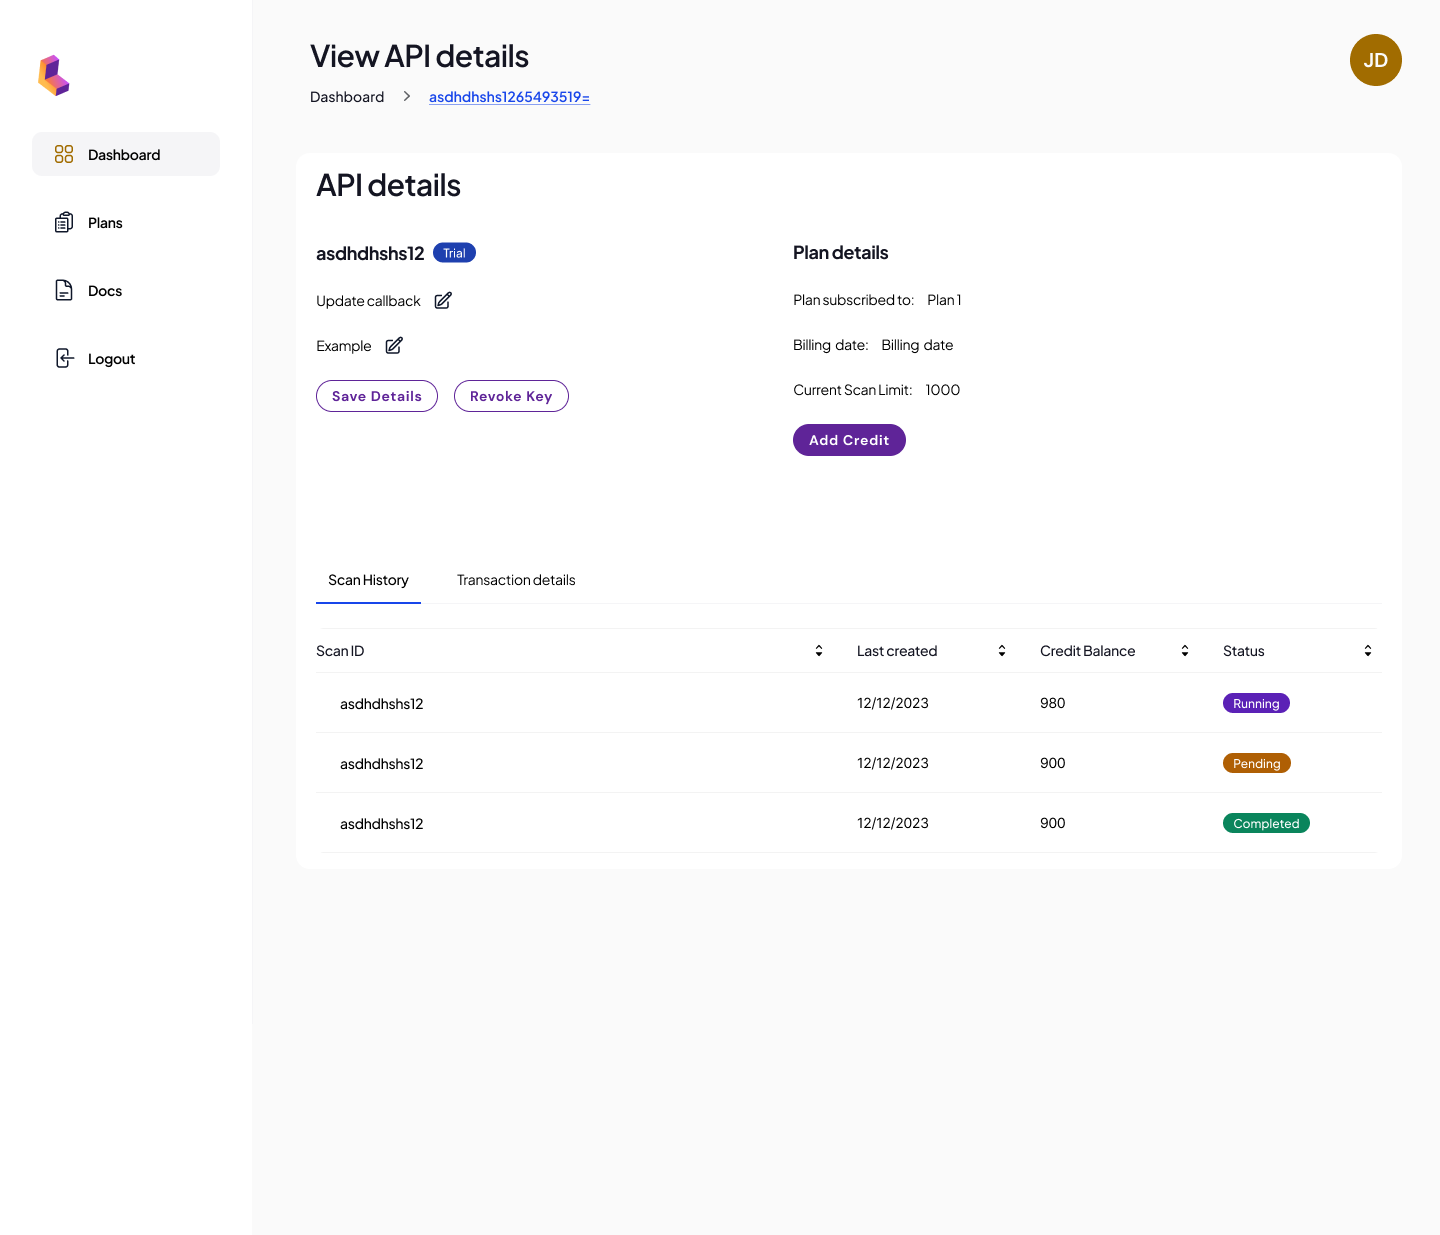
1. API Key: In the scan request, replace the placeholder at the end of the endpoint URL with your actual API key, which you can copy from the dashboard.
2. Request Headers: Ensure that your request headers are configured as outlined in the documentation below:
- Content-Type: application/json
- Session Cookies:
- Postman will automatically set the cookies.
- If using a terminal (Curl, Wget etc), use the login endpoint and configure the following flags:
- -X to specify it is a POST request
- -H to add headers for "Content-Type:application/json"
- -d to provide the request body including your email and password
- You will need to use the response from the /login endpoint that includes the Cookie attribute. Copy the Cookie value from the login response
- Initiate a scan using terminal using the /start_audit endpoint and configure the following flags:
- -X to specify it is a POST request
- -H to add headers for "Content-Type:application/json"
- -b to add the Cookie, for example, “token=12345abcdef..."
- -d to provide the request body including the URL, and Callback URL
- Request Body: Provide the URL you wish to scan, and a callback URL to receive the scan results.
The request body should be a JSON object containing the following parameters:
- url (string, required): The URL of the website to be audited. Ensure the URL begins with https://.
- callback_url (string, required): The URL to which the audit results will be sent.
Example Request via Postman:
{
  "url": "https://example.com/",
  "callback_url": " https://your-callback-url.com "
}

Example Request via Terminal
Bash
curl -X POST "https://api.lera.cloud/api/start_audit/your-api-key" \
-H
"Content-Type: application/json" \
-d '{
      "url":
"https://example.com/",
      "callback_url":
"http://example.com:3000/callback"
   }'
Example Request via Terminal
Viewing Scan Results
Successful Response (200 OK)
If the request is successful, you will receive a 200 OK status, along with the following data:
- Audit ID: The unique identifier for the scan.
- Links Scanned: The number of links scanned within the provided URL.
- Remaining Scan Limit: Reflects how many scans are left based on your current plan. Each key starts with the maximum number of credits paid for, and this value decreases with each subsequent scan.
json
{
    "audit_id": "670ff608bbcd5c67643f61d4",
    "num_links": 5,
    "scan_limit": 70
}

After completing the scan
Once a scan is completed, you can also compare the Metadata received in Postman within the API key details page. Metadata comprises the Audit ID, Number of links scanned, and remaining Scan Limit for the plan.
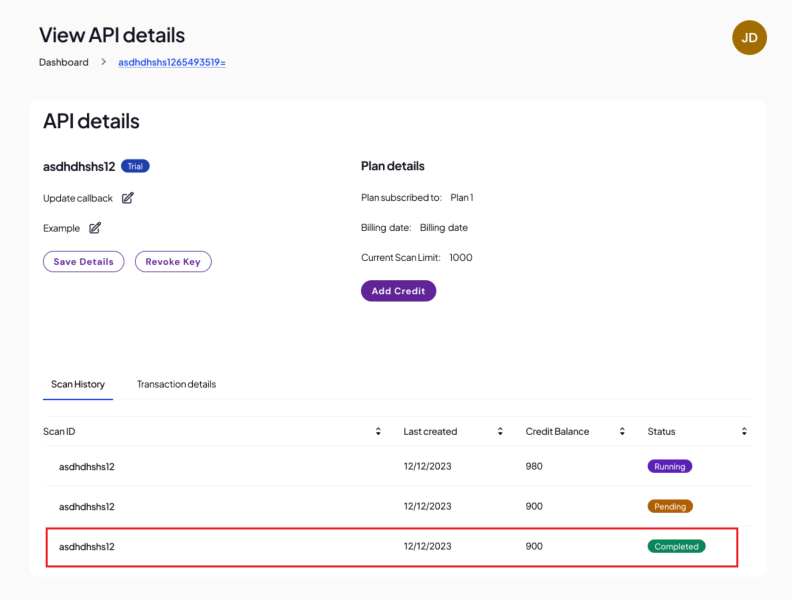
Steps to view Metadata in the Dashboard:
1. Dashboard: Return to the API key details page on the Dashboard and refresh it to view the latest scan status.
2. Scan ID: You can verify that the correct scan ran by checking the scan ID in the table. For example, the scan ID may look like 996590, and the status will indicate whether it’s completed.
Sample JSON response structure:
If a callback URL was used, the complete scan results with the data along with Metadata can be found in the JSON response.
{
 "first_batch": true,
   "metadata": {
       "audit_id": "aaabbbcccddd111222333",
       "audit_url": "leracloudstg.wpenginepowered.com",
       "callback_url": "https://YOUR_DOMAIN/callback",
       "start_ts": 1729518948673,
       "end_ts": 1729518969080,
       "num_pages": 5,
       "testEngine": {
           "name": "axe-core",
           "version": "4.8.2"
       },
       "toolOptions": {
           "branding": {
               "application": "Advancedbytez"
           },
           "runOnly": {
               "type": "tag",
               "values": [
                   "wcag2a",
                   "wcag2aa",
                   "wcag21a",
                   "wcag21aa",
                   "wcag22a",
                   "wcag22aa"
               ]
           },
  "reporter": "v1"
       },
       "batch_id": "b1",
       "batch_pages": 5
   },
   "total_pages": 5,
   "pages": [],
   "audit_analytics": {
       "num_pages": 5,
       "total_issues": 189,
       "category_count": {
           "color": 175,
           "name-role-value": 11,
           "aria": 2,
           "text-alternatives": 1
       },
       "num_critical": 1,
       "num_serious": 188,
       "num_moderate": 0,
       "num_minor": 0,
       "accessibility_score": 36
   }
}
If you don’t provide a callback URL, only the scan summary will appear directly in the response, but the actual data won’t be delivered elsewhere.
Subscription Features
Batched delivery
The response data will be available in batches of pages determined by the plan subscribed to. The available page batch limits per scan are 50, 200 and 500. As the website gets larger, the data will be received in bigger chunks for seamless delivery.
Please refer to the Billing page for more details.
Tiered Data Response
The response data will also vary based on the subscription.
- Starter plan receives only raw data.
- Growth plan will contain site-wide analytics such as the total number of violations, and their severity distribution.
- Enhanced plan returns enhanced analytics along with the raw data. This includes all the analytics from the Growth plan with the addition of page level violation count, category, severity distribution, a page analytics and site accessibility score.
Please refer to the Billing page for more details.
Error Handling
If a request fails, the API will return an error message explaining the issue. Ensure that:
- Your API key is correctly passed in the request.
- The headers are configured according to the documentation.
- The request body contains the correct data format.
Error Codes
Here are the potential error codes that can be returned by the API and their meanings:
- 200 OK: The request was successful, and a scan has been initiated.
- 400 Bad Request: The request is invalid. Common causes include:
- Missing required fields (url or callback_url).
- Incorrect formatting of the request (e.g., not using JSON).
- URL without https:// prefix.
- 401 Unauthorized: The API key is incorrect, missing or the authorization token is not set/invalid.
- 402 Scan Limit Reached: The account has exhausted its available scan credits.
- 404 Not Found: The requested URL could not be found (incorrect API endpoint).
- 405 Method Not Allowed: Invalid HTTP method (only POST is allowed).
- 410 Gone: The requested resource has been removed from the server.
- 429 Too Many Requests: Too many scan requests in a short period. Wait before making additional requests.
- 500 Internal Server Error: A server issue occurred. Retry the request or contact support if the issue persists.
- 503 Service Unavailable: The service is temporarily offline for maintenance. Please try again later.
Frequently Asked Questions
Billing
1. How do I get an API key?
You can obtain a free Trial API key by registering for an account on the Lera API portal. Once registered, the key will be provided for use with all API requests.
2. How many scans can I run with the default API key?
The default API key comes with 100 free credits as a trial, and each scan reduces the available credit balance. The scan_limit field in the response will indicate your remaining credits. Please visit our pricing page to learn more about the available options.
3. Can I upgrade or downgrade an API key?
There is no upgrade or downgrade feature with our offering. Each API key is associated with one subscription plan. For example, If you purchase a Starter plan and require a higher plan, you can purchase the next higher plan - Growth or Enhanced. The Starter plan will remain active until you Revoke the key.
Each Unique API Key = 1 New Subscription
4. What is my billing cycle?
The billing cycle date starts on the day you purchase an API key and reset after 30 calendar days.
5. Do credits rollover?
Credits do not rollover and any unused credits will expire at the end of the billing cycle. The API key limit will be reset at the beginning of the next billing cycle.
6. Can I upgrade or downgrade an API key?
There is no upgrade or downgrade feature with our offering. Each API key is associated with one subscription plan. Fog example, If you purchase a Starter plan and require a higher plan, you can purchase the next higher plan - Growth or Enhanced. The Starter plan will remain active until you Revoke the key.
7. Will I get charged for unused API keys?
Yes. You will be billed for each key if a payment method is saved on file, unless you Revoke the key. The key can be revoked at any time from the API Details page.
8. What happens when I reach my scan limit?
If your account has reached its scan limit, you will receive a 402 Scan Limit Reached error. To continue scanning, top up your account through the Lera portal.
You don’t need to alway purchase a new plan if you run out of credits before the billing cycle resets. There is an option to Purchase more credits to top up your current plan for as little as $10.
Technical
9. Why did I receive a 400 error?
A 400 Bad Request error typically occurs if the request is missing the required fields (url or callback_url), the URL lacks the https:// prefix, or the request is not formatted as JSON.
10. How can I troubleshoot a 500 error?
A 500 Internal Server Error means something went wrong on the server side. Try the request again after some time. If the problem persists, reach out to our support team with the request details (the URL you are trying to scan including body and response).
11. What is the session duration for API authentication?
The session is valid for 24 hours. After that, you will need to re-authenticate using the login endpoint.
12. How do I retrieve my API key?
Your API key is available on the API key details page in your dashboard.
13. Can I revoke an API key?
Yes, there is a "Revoke Key" button in the API key details page. Once revoked, you will not be billed for that key or be able to use it anymore. Please ensure that you are updating the revoked key with a new one in all places used to avoid a 401 Unauthorized error.
14. What happens if I don't use a callback URL?
If you don’t provide a callback URL, only the scan summary will appear directly in the response, but the actual data won’t be delivered elsewhere.